

What are Kubernetes services?
A Kubernetes service can be used to easily expose an application deployed on a set of pods using a single endpoint. Service is both a REST object and an abstraction that defines:
A set of pods
A policy to access them
Pods in a Kubernetes deployment are regularly created and destroyed, causing their IP addresses to change constantly. It will create discoverability issues for the deployed, application making it difficult for the application frontend to identify which pods to connect.
This is where the strengths of Kubernetes services come into play: services keep track of the changes in IP addresses and DNS names of the pods and expose them to the end-user as a single IP or DNS.
Kubernetes services utilize selectors to target a set of pods:
For native Kubernetes applications, the endpoint API will be updated whenever there are changes to the pods in the service.
Non-native applications can use virtual-IP-based bridge or load balancer implementation methods offered by Kubernetes to direct traffic to the backend pods.
Task-1:
Create a Service.
Create a Service definition in a YAML file.
Apply the Service definition to your K8s (minikube) cluster using the
kubectl apply -f service.yml -n <namespace-name>command.Verify that the Service is working by accessing the Service's IP and Port in your Namespace.
For this task we need to create a service yaml file and create it in development namespace
apiVersion: v1
kind: Service
metadata:
  name: myfirstservice
  namespace: development
spec:
  selector:
   app: development
  ports:
    - name: http
      port: 80
      targetPort: 80
      protocol: TCP
So this is the cluster service file and we will apply in the namespace we created as
kubectl apply -f cluster-service.yaml -n development.We can check the service if deployed
kubectl get svc -n development
Task-2:
Create a ClusterIP Service for accessing theapp from within the cluster
Create a ClusterIP Service definition for your app Deployment in a YAML file.
Apply the ClusterIP Service definition to your K8s (minikube) cluster using the
kubectl apply -f cluster-ip-service.yml -n <namespace-name>command.Verify that the ClusterIP Service is working by accessing the todo-app from another Pod in the cluster in your Namespace.

ClusterIP can mean 2 things:
a type of service that is only accessible within a Kubernetes cluster,
the internal ("virtual") IP of components within a Kubernetes cluster.
ClusterIP accesses the services through proxy. ClusterIP can access services only inside the cluster.
ClusterIP is the default Kubernetes service. This service is created inside a cluster and can only be accessed by other pods in that cluster. So basically we use this type of service when we want to expose a service to other pods within the same cluster.
This service is accessed using the Kubernetes proxy.
Default Kubernetes service type is clusterIP, When you create a headless service by setting clusterIP None, no load-balancing is done and no cluster IP is allocated for this service. Only DNS is automatically configured. When you run a DNS query for headless service, you will get the list of the Pods IPs and usually, client DNS chooses the first DNS record.
clusterIP service creates a single cluster IP and distributes the traffic between pods.
Now we will use the pod we deployed earlier in the same namespace and expose it with the same cluster service.
kubectl expose pod pod1 --port=8000 --target-port=80 --name myfirstserviceNow we have exposed it on clutser with the cluster ip.We can check same with curl <cluster ip>

here we can see the pod can be accessed inside the cluster as we have provided cluster ip to it.
Task-3:
Create a Nodeport Service for accessing the app from outside the cluster
Create a Nodeport Service definition for yourapp Deployment in a YAML file.
Apply the Nodeport Service definition to your K8s (minikube) cluster using the
kubectl apply -f nodeport-service.yml -n <namespace-name>command.Verify that thenodeport Service is working by accessing the app from outside the cluster in your Namespace.
  apiVersion: v1
  kind: Service
  metadata:
    name: myfirstservice
    labels:
            servicelbl: labelname
  spec:
    type: NodePort
    selector:
      type: app
    ports:
      - port: 9000
        targetPort: 80
        nodePort: 32000
Here we are going to write service file for Nodeport and assign it to port 32000.
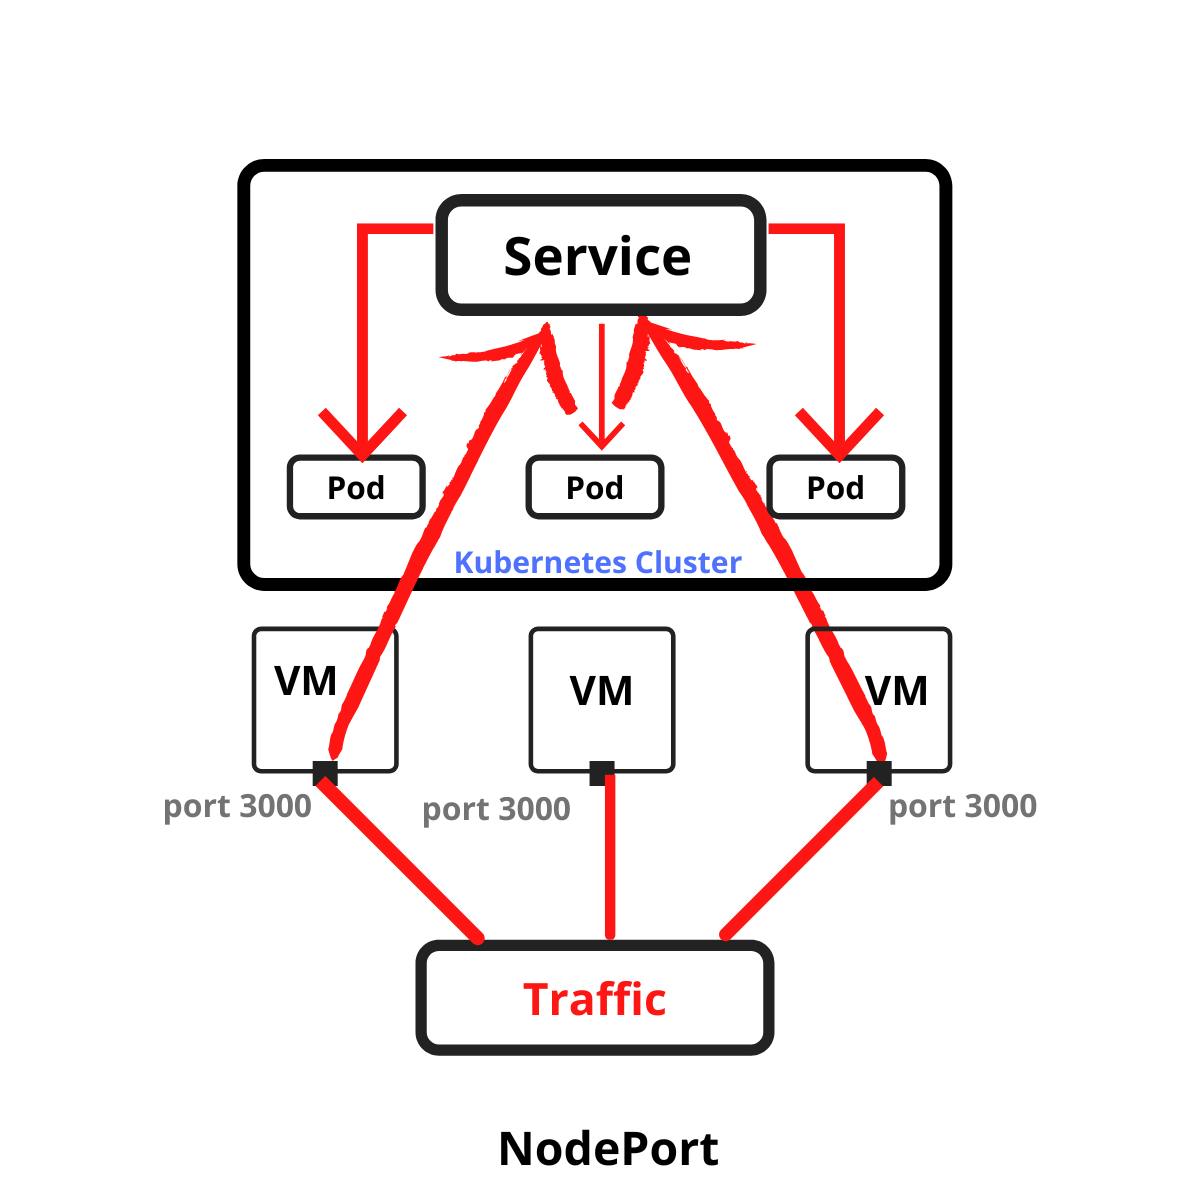
A NodePort service is the most primitive way to get external traffic directly to your service. NodePort, as the name implies, opens a specific port on all the Nodes (the VMs), and any traffic that is sent to this port is forwarded to the service.
Exposes the Service on each Node's IP at a static port (the NodePort). A ClusterIP Service, to which the NodePort Service routes, is automatically created. You'll be able to contact the NodePort Service, from outside the cluster, by requesting <NodeIP>:<NodePort>
To make it attached to pod directly we will write pod's manifest file as
apiVersion: v1
kind: Pod
metadata:
   name: pod1
   labels:
       type: app
spec:
  containers:
      - name: container
        image: nginx
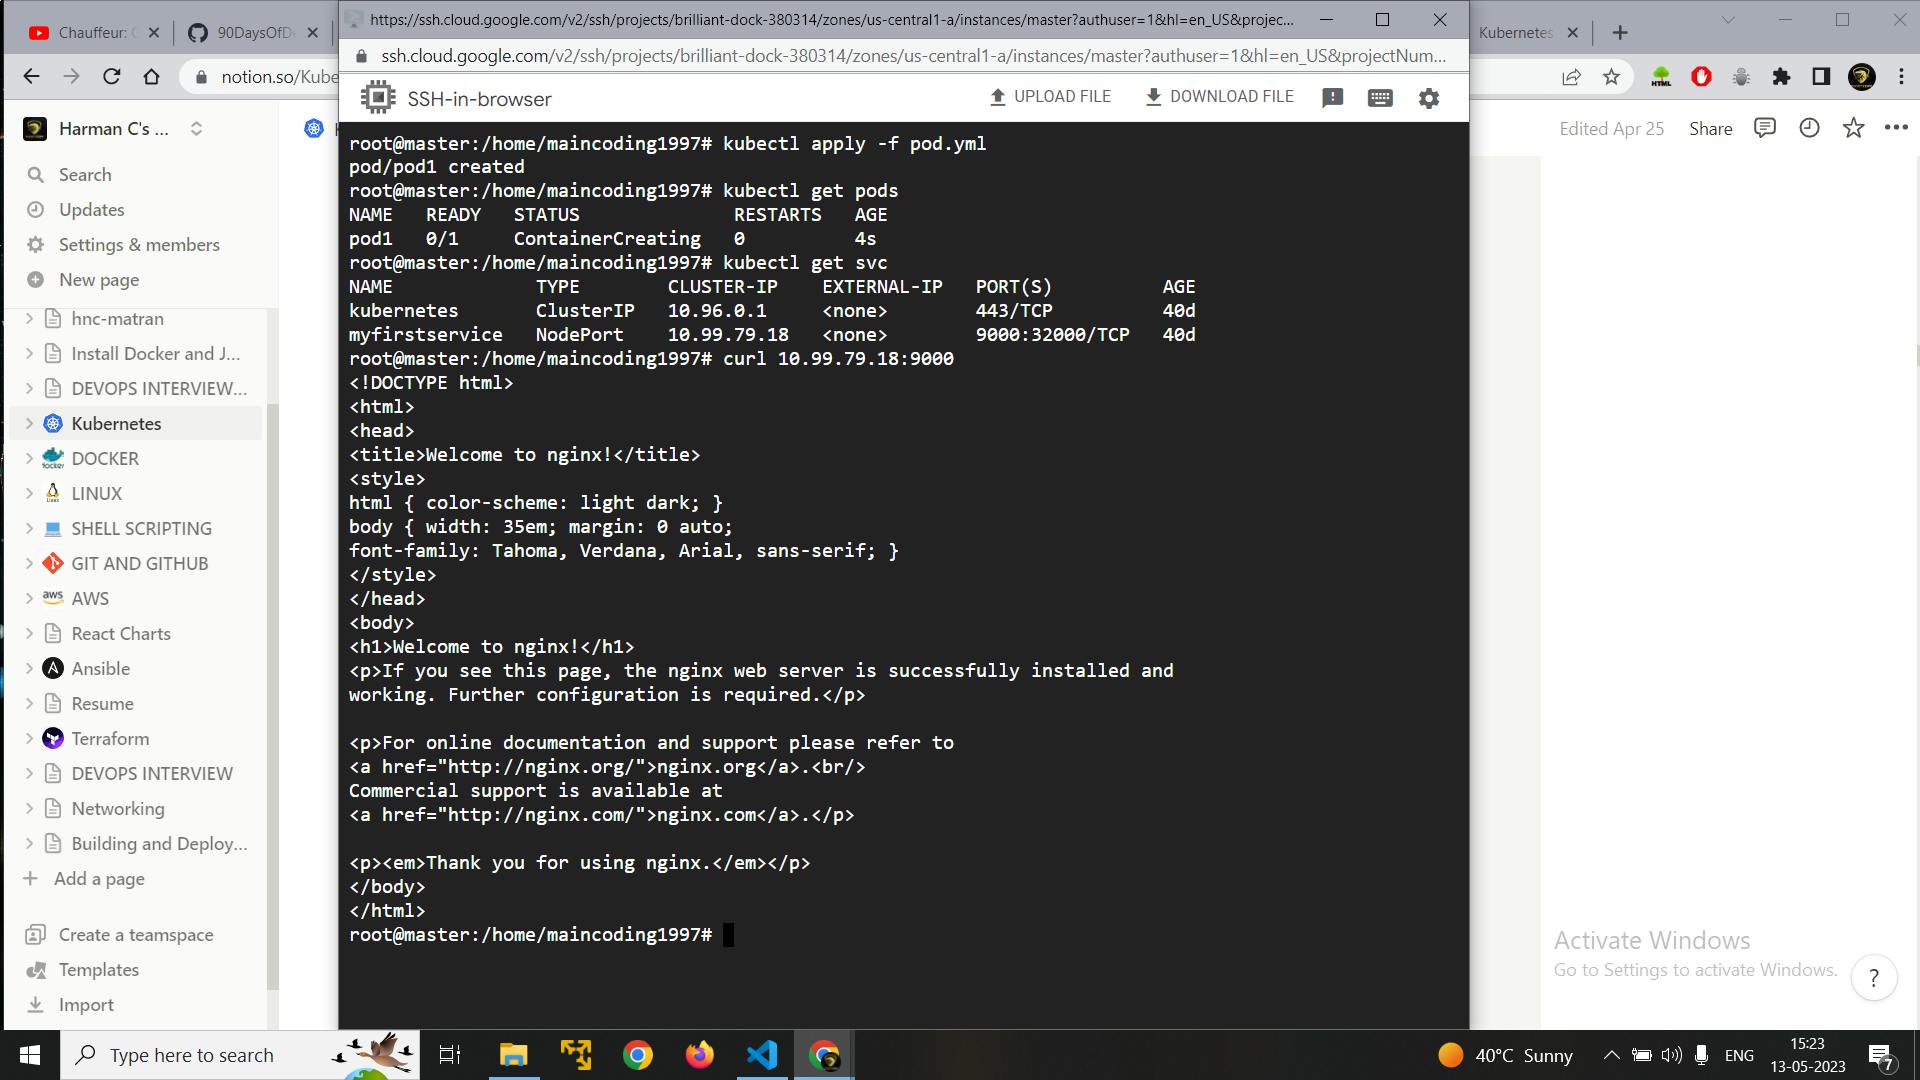
In this we attached the selector type of app that we mentioned in service and now we need not to run any other command we just hit
kubectl apply -f pod.yamlAnd now our pod is accessible to outer world just make sure port 32000 is allowed in security groups/ firewall

End of the post
Reach me on: